On to my Wraithguard - iconic eldar unit, of which I had 10 pewter models in the late 90s. They were one of my favourite units to both paint and use at the time and I've been looking forward to building the modern plastic kits.

However, unlike the 90s version, you now have 4 different loadouts that they can be equipped with: - D-cannon
- D-scythe
- Dual swords
- Axe & shield
Rather than pick 1, I gave myself the same headache I had with terminators a while ago - deciding that the only way to build elite squads is to magnetise the hell out of everything. The close combat weapons look particularly cool, but the d-cannon was the definitive (only?) option in the 90s.
The kit comes with a single left arm that can be used for the 2 ranged weapon options; and a single close combat right arm that can be glued to either an axe or sword. While there are plenty of parts to build the models permanently with any of the loadouts, it's much harder to magnetise and have all the options available. Basically every joint needs to be magnetised otherwise you run out of parts.
I did have a go at trying to magnetise the wrist for the axe/sword loadout but the plastic is too narrow for a decent sized magnet and it just wasn't working. There is really only enough space to put a 1mm magnet into the wrist and these just lack the strength to hold the joint with stability. I eventually got a set of spare right arms from a bitz site so the sword and axe options each have a whole arm permanently attached - that way the only magnet needed is at the shoulder joint.
Even without magnetised wrists.. each wraithguard therefore ended up with magnets for - both sides of the torso (2), two ranged weapon right arms (2), one ranged weapon left arm (1), tiny magnet in the left ranged wrist and the hand on each of the ranged weapons (3), two sword arms (2), axe arm and shield arm (2)
= 12 magnets per wraithguard. And 7 detachable arms that also need to be painted.
= 180 magnets in total for 15 models. with 105 arms for loadout options between them.
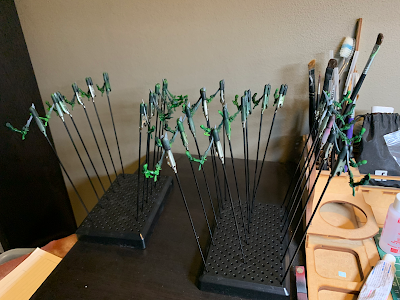
Having learn a bit from working on the guardians, I've switched to gluing a pin into 1 leg before priming - this should make it much easier to grip in the alligator sticks and do priming in one go rather than having to swap.
While the arms are kind of interchangeable - each pair of legs only has one loincloth that matches it in the box. As I'm putting together 3 boxes worth of 5 models, it made sense to keep the 3 identical cloth pieces together during priming so I could work out which pose they would glue onto later.
I kind of lost track of how long these took to prepare - the parts were cleaned up, drilled, magnetised and prepped over probably a couple of months in between doing other projects - eventually though all 180 magnets are installed, 105 arms prepped and all the heads & cloths that will be primed white are separated for painting.
Bodies and arms start with black; the white parts get a vallejo grey primer. I might need to get a vallejo white at some point - I did try stynylrez white primer but didn't like the texture it was giving me. In any case, since white can be easy to chip I don't mind it getting an extra layer of primer before the white layer anyway.
The main colouring then is a layer of caliban green air (mostly all over but particularly from top down) then moot green on toes, knees, shoulders and high points. I kind of gave up on trying to do an intermediate layer using warpstone glow - it wasn't adding much benefit vs just having the light to dark contrast from a darker green and it's not made for the airbrush anyway so needs lots of mixing first.
These get an overall wash in biel tan green (which tones some of the super bright moot green) after which they can come off the painting sticks and go onto bases. I've quite enjoyed using the Dragonforge bases - I like that I can just paint them then drill pin holes anywhere later on; for my marines I was always worried about knocking glued details off the stock black bases after painting, so pinning was always a much more laborious process.
By skipping the blutac step I was using on the guardians, installing the bases is pretty quick - use the pin to mark a hole and drill it into the base; loosely stick a spare piece into the 2nd leg and use it to scratch a mark for the second hole. Drill it and they line up perfectly for a secure pin.
With the bodies mounted onto bases I'm then going around doing a quick job to block any black areas in with contrast black templar.
With the painting sticks now freed up, it's also back to the airbrush to prime and green the 100+ arms. The don't take long each, but it still adds up over that many. My airbrushing accuracy may have gotten a bit loose over time - a good number of these are basically just green sprayed vaguely from one side rather than any detail spot highlighting.
The next step is the slightly long and laborious process of painting in gems, silver details and then finishing off the white parts for assembly.


No comments:
Post a Comment