Breaking the War Walker & Wraithlord post into two halves - part 2 moving onto painting and putting the subassemblies together.
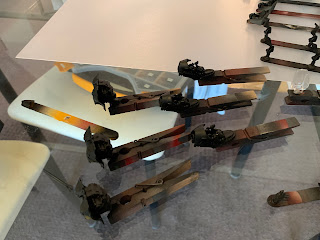
Starting with lots and lots of priming. White parts being done separately while the rest gets a start of black. Bases also being batch painted with black primer for the walkers... plus several for the next special project (hovertanks) coming up.
There isn't a heap of white on the walkers - just heads/helmets and banners. The photos of black primer parts are pretty poor. I just snapped a couple while using the airbrush on dining table.
I was also testing out some options to make the canopies 'clear'. Model aircraft painters swear by putting a clear varnish on canopies as it smooths the surface imperfections and makes it look more like glass than plastic. The one on the right is a clear gloss varnish through the airbrush. It looks rubbish.
The one on the right is using a couple of thin layers of the secret ancient recipe of Pledge floor polish. This has been used by aircraft modellers for decades and I found a bottle online years ago for an unreasonable amount of cash (since it was never sold in Australia). Having said that - I still have about 680ml of the 700ml bottle remaining, so it's likely to see out my lifetime.
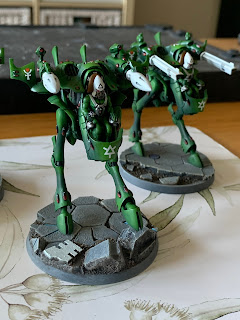
This is always a fun part - adding moot green highlights over caliban green. Keep the paint really thin, pretty low air pressure, done in a few layers. The first one is a bit experimental and slower - once happy with where the brightest points are, repeat on the others.
Similar with the 2 wraithlords - albeit they have followed a similar highlight location to the completed wraithguard. At this point everything has had a solid coat of gloss varnish to lock the colour in and help with shading.
I've kept edge highlighting pretty much absent from my Eldar - it's not as sharp looking, but I made a conscious call when starting the army that I would trade off the extra pop for far less time with a fine detail brush. Having done 150+ blood angels with edge highlights (for relatively subtle difference), it does give me some joy to think about how much time I've *not* spent on these.
Big things though - do need attention. I've flooded the engine areas on the walkers with black contrast. It's quick, and there is a subtle hint of a highlight on the sharp edges where the contrast pulls away.
The rest of the green armour really follows my standard approach now - biel tan green wash all over (careful to avoid pooling too much - and using a brush with just water to draw it off the big flat area); black out the gems and work through red/orange highlights. Leadbelcher & nuln oil metals. Wraithseer and corax white for any decorations.
I've added a couple of thin stripes of screamer pink on the wraithlord banners. Both the front and the back ones. For the front - these have also had some Eldar(ish) scribbles added. Since the white parts still have a good layer of gloss varnish - it's onto decals.
The walkers have been glued to their bases - but not joining the bodies until the pilod decals (and heads) are in place). These are pretty straightforward - and I'm kind of glad I puttied over the join in the front of the cockpit, as it's made the surface there nice and smooth.
In a minor tactical challenge - I realised about this point that the red+black decals that went onto the wraithguard only come in red+white in the bigger sizes. So once the decal has set, I need to go back in and trace the ones on the cloth by hand.
First tentative lines.
Not perfect but ok at a table distance.
These guys are getting added to their bases as well.
I eventually decided the side weapon brackets on the walkers would just be held in by friction. If needs be they can be glued permanently later - in the meantime they can be adjusted slightly up or down with the angle of weapon.
The shoulder mounts on the dreadnoughts are small areas - my magnet/weapon alignment is just slightly off so depending on which heavy items are in use the tips of the weapons can be slightly different angles. Bit annoying but can live with it.
Temporary parking while cleaning up the tables. All starting to feel like a cohesive army colour - which I take a bit too much joy in.
With all the glues dried - the weapon loadouts can look something like this. The weapons here have been borrowed from guardian weapon platforms. Reassuringly they all work interchangeably.
For subtle dynamic posing - the lead walker has a foot raised above the rock. This leg has a wire pin joined carefully to give it more stability.
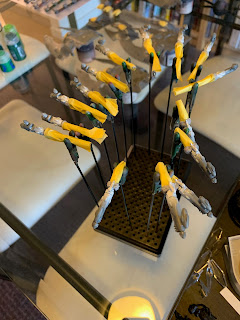
Meanwhile after a few days of the white & gloss coats on the weapons having cured, I'm doing the other green elements. For some silly reason I didn't just paint the guardian platform weapons purely white - so these need to be flipped around and masked to do the green parts.
If anyone is just starting out - I highly recommend just painting the entire weapons in one colour. The effect is kind of cool, but not cool enough to warrant extra hours with masking tape & blutac. Let alone having to effectively paint them with airbrush twice, with enough time apart for fully cure.
On the plus side, it did mean that I was able to go over the otherwise completed models with a solid layer of matt varnish. This has to be done before adding any grass to bases - and in this particular case, the canopies.
Obviously if the matt varnish goes on the glass, the clear glossy look is lost - so the green needs to be matt varnished before the masking comes off. The effect seems to have held, and it gives a pretty decent final look. Once these are glued in with some microscale canopy set - we're done on the walkers.
Last airbrush detail is to have a go at the wraithlord swords. These are coloured once, then masked so the other half of the blade can get a reversed pattern. I am generally finding it much easier to start with white and then add progressively darker colours - every time I've tried going from dark to light I get more speckling with the white paint and lose some of the effect.
Vallejo squid pink, warlord purple, hexed lichen.
For the masking - there is a subtle curve to the blades. I traced the edge of the blade onto some clear plastic from a file folder, then used this to trim a piece of masking tape. Flip the template to do masking tape for the other side of the blade.
End result... is actually pretty flash. It could maybe benefit from a fine edge highlight in white - I suspect that the risk of making it look worse is a fair possibility.
Quite enjoyed doing these - it's all the same process as guardians & wraithguard, just on a bigger scale (which makes it easier to see) and done 5 times instead of 60. If I was to add an extra model at some point, I'd maybe push a bit more for unique poses or some extra stripes/decoration. Having said that - they look pretty good, carry over all the colour/style/effect of the troops - which should make it look like a really cohesive army on the table.


No comments:
Post a Comment