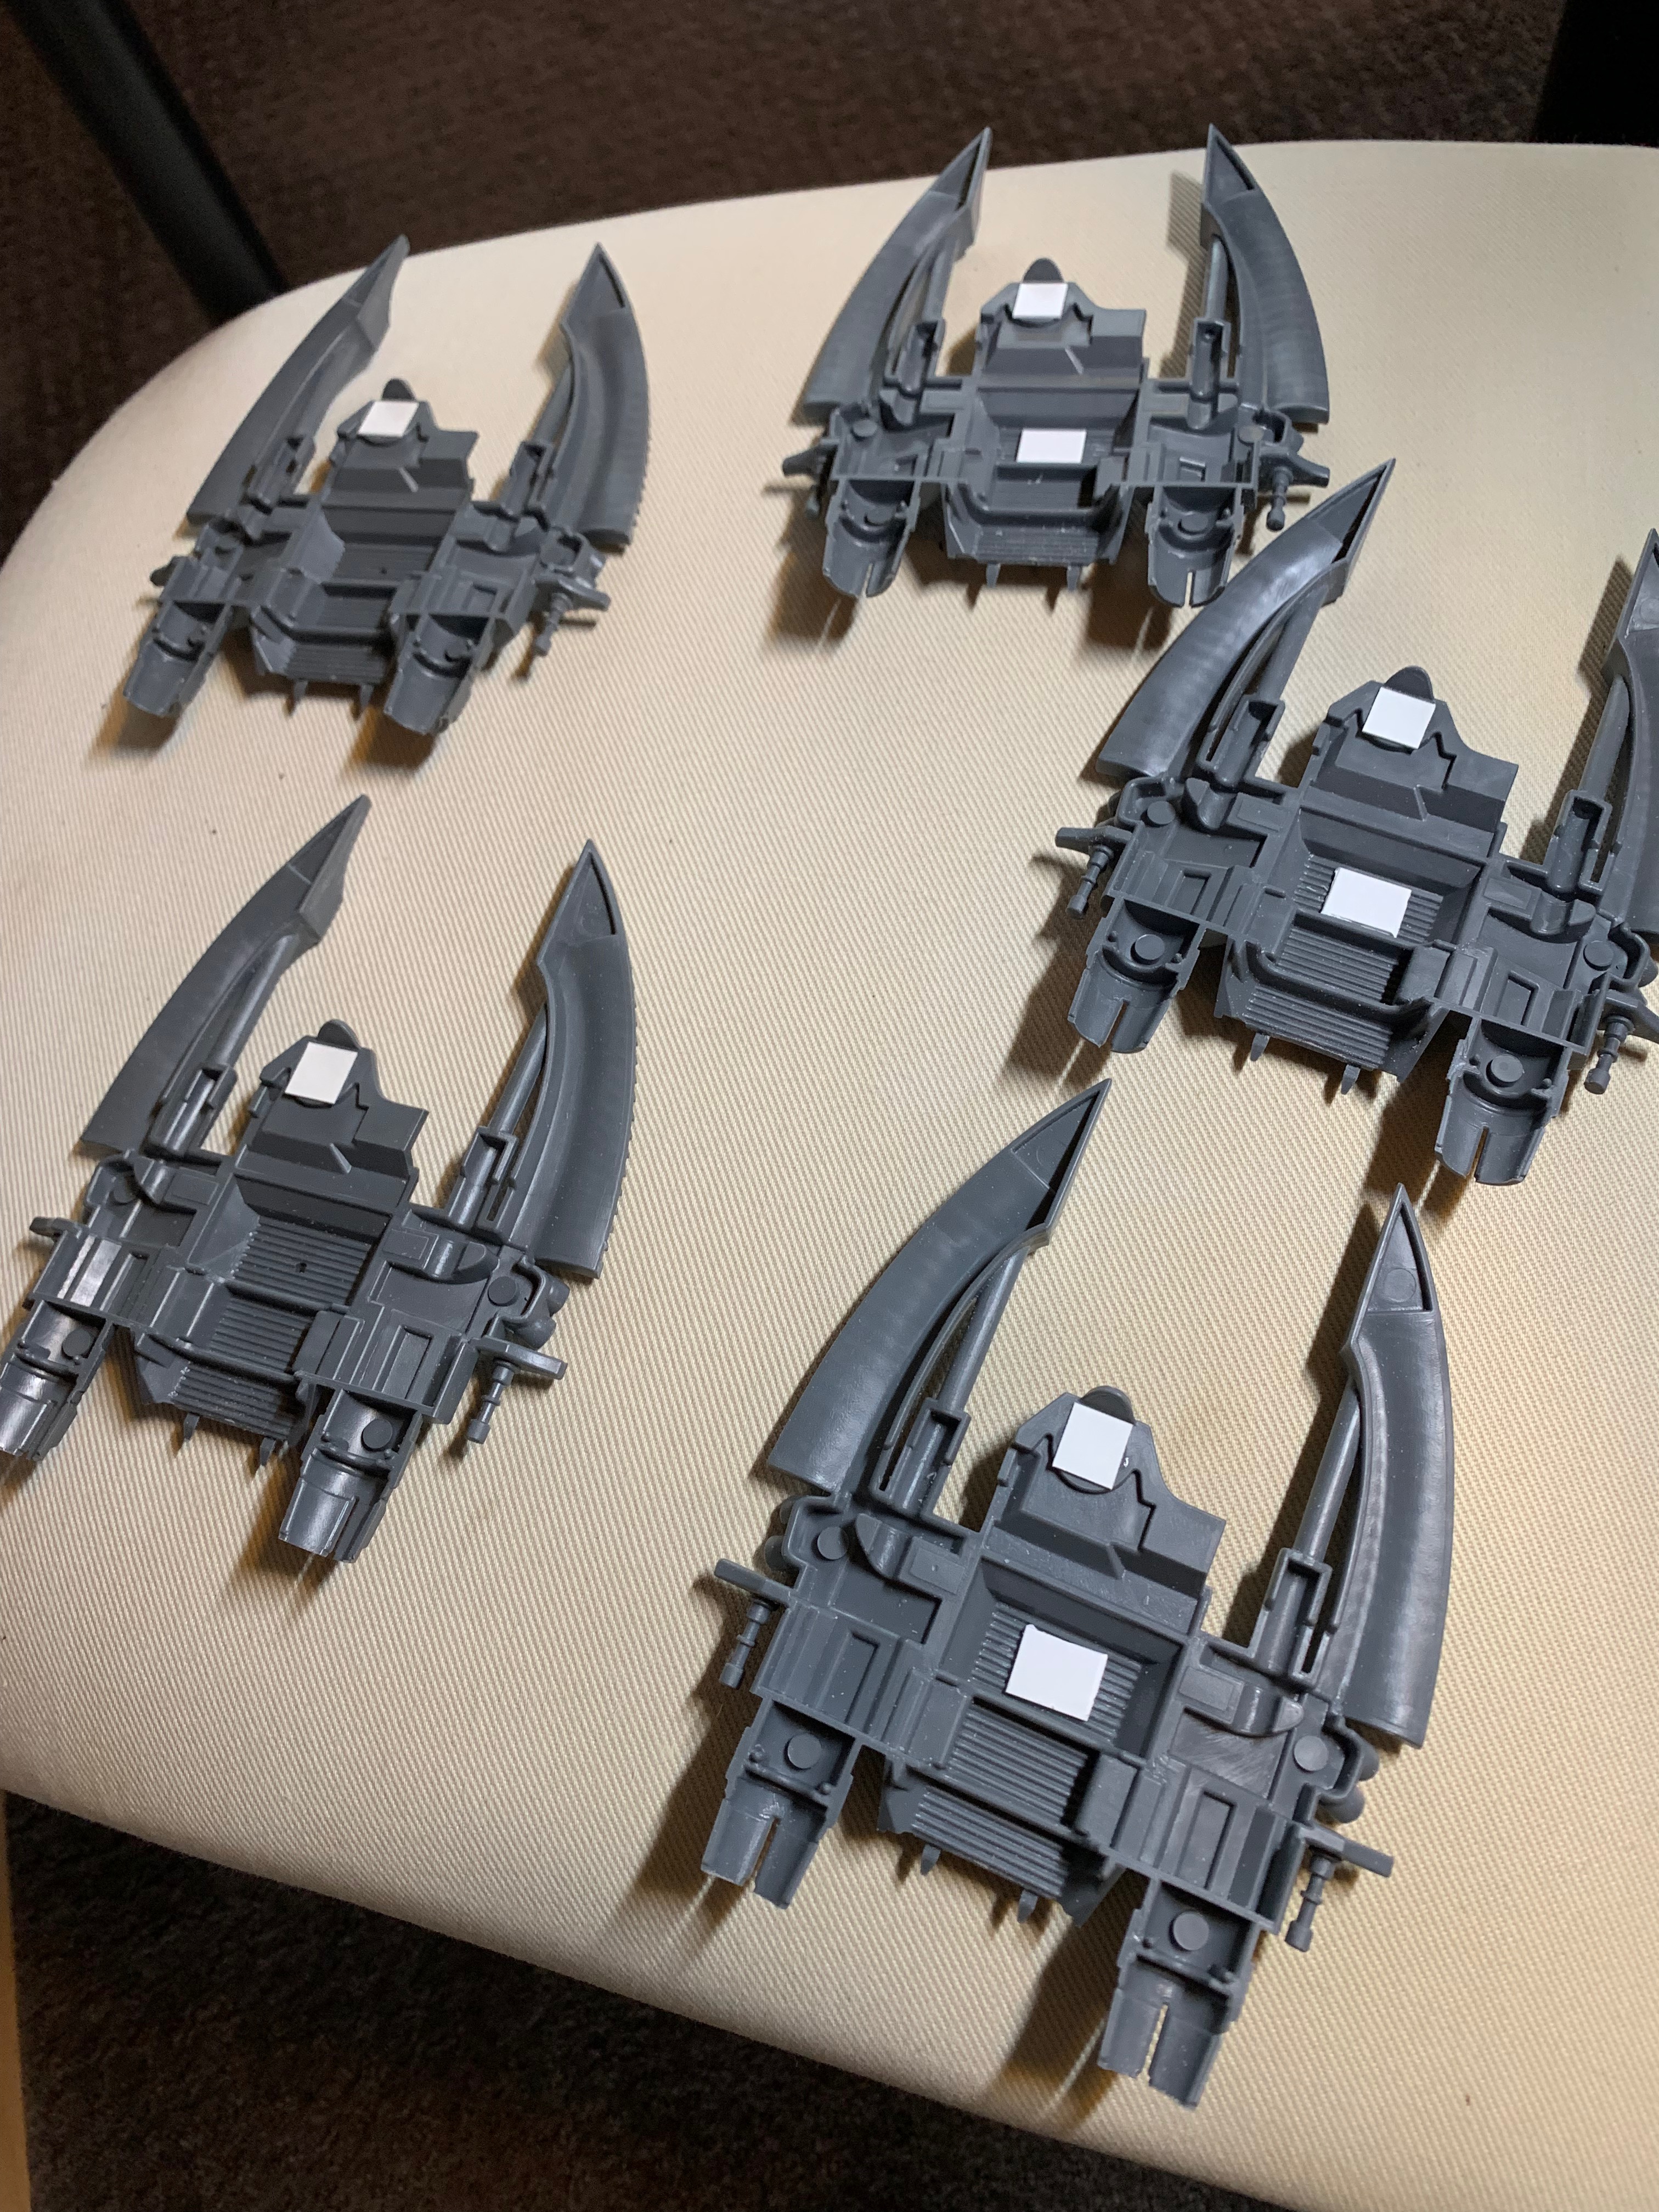
Moving onto the construction & magnetisation of the tank division - this will be 2 serpents, and 3 falcon chassis (2 prism/spinners and 1 falcon). Strap in because there were a lot of magnets and engineering steps in getting these ready for paint.

After clipping out the big pieces and doing the usual cleanup of mold lines, I've started by widening out the flying stand holes to take 6mm magnets. I will be doing something funky with custom stands later on. The idea here is that a nice big magnet will keep these in place, while still allowing for the bases to be separated for transport (or showing a crashed/disabled vehicle).
This is a bit of an old affectation - I had a set of 6 jetbikes in the 90s on hexy flying bases. Every single one of them snapped at some point in transit, and no amount of glue ever got them back to a happy place. This may say more about my transport packing - but there you go. We're doing magnets this time.
The serpent hull has an extra piece that forms the troop cabin - the magnet goes here, not the falcon hull it is covering up. The falcon magnets go in the obvious place.


3-6mm drill bits are a little harder to twist by hand - so I may have had a little help from pliers to do this. It's only 1mm thick hull so doesn't take too long.

Bases have already been painted while doing the ones for walkers earlier on.

As had the clear coat on the canopies - this is a coat of pledge varnish to make the windows look a bit clearer and glass like.


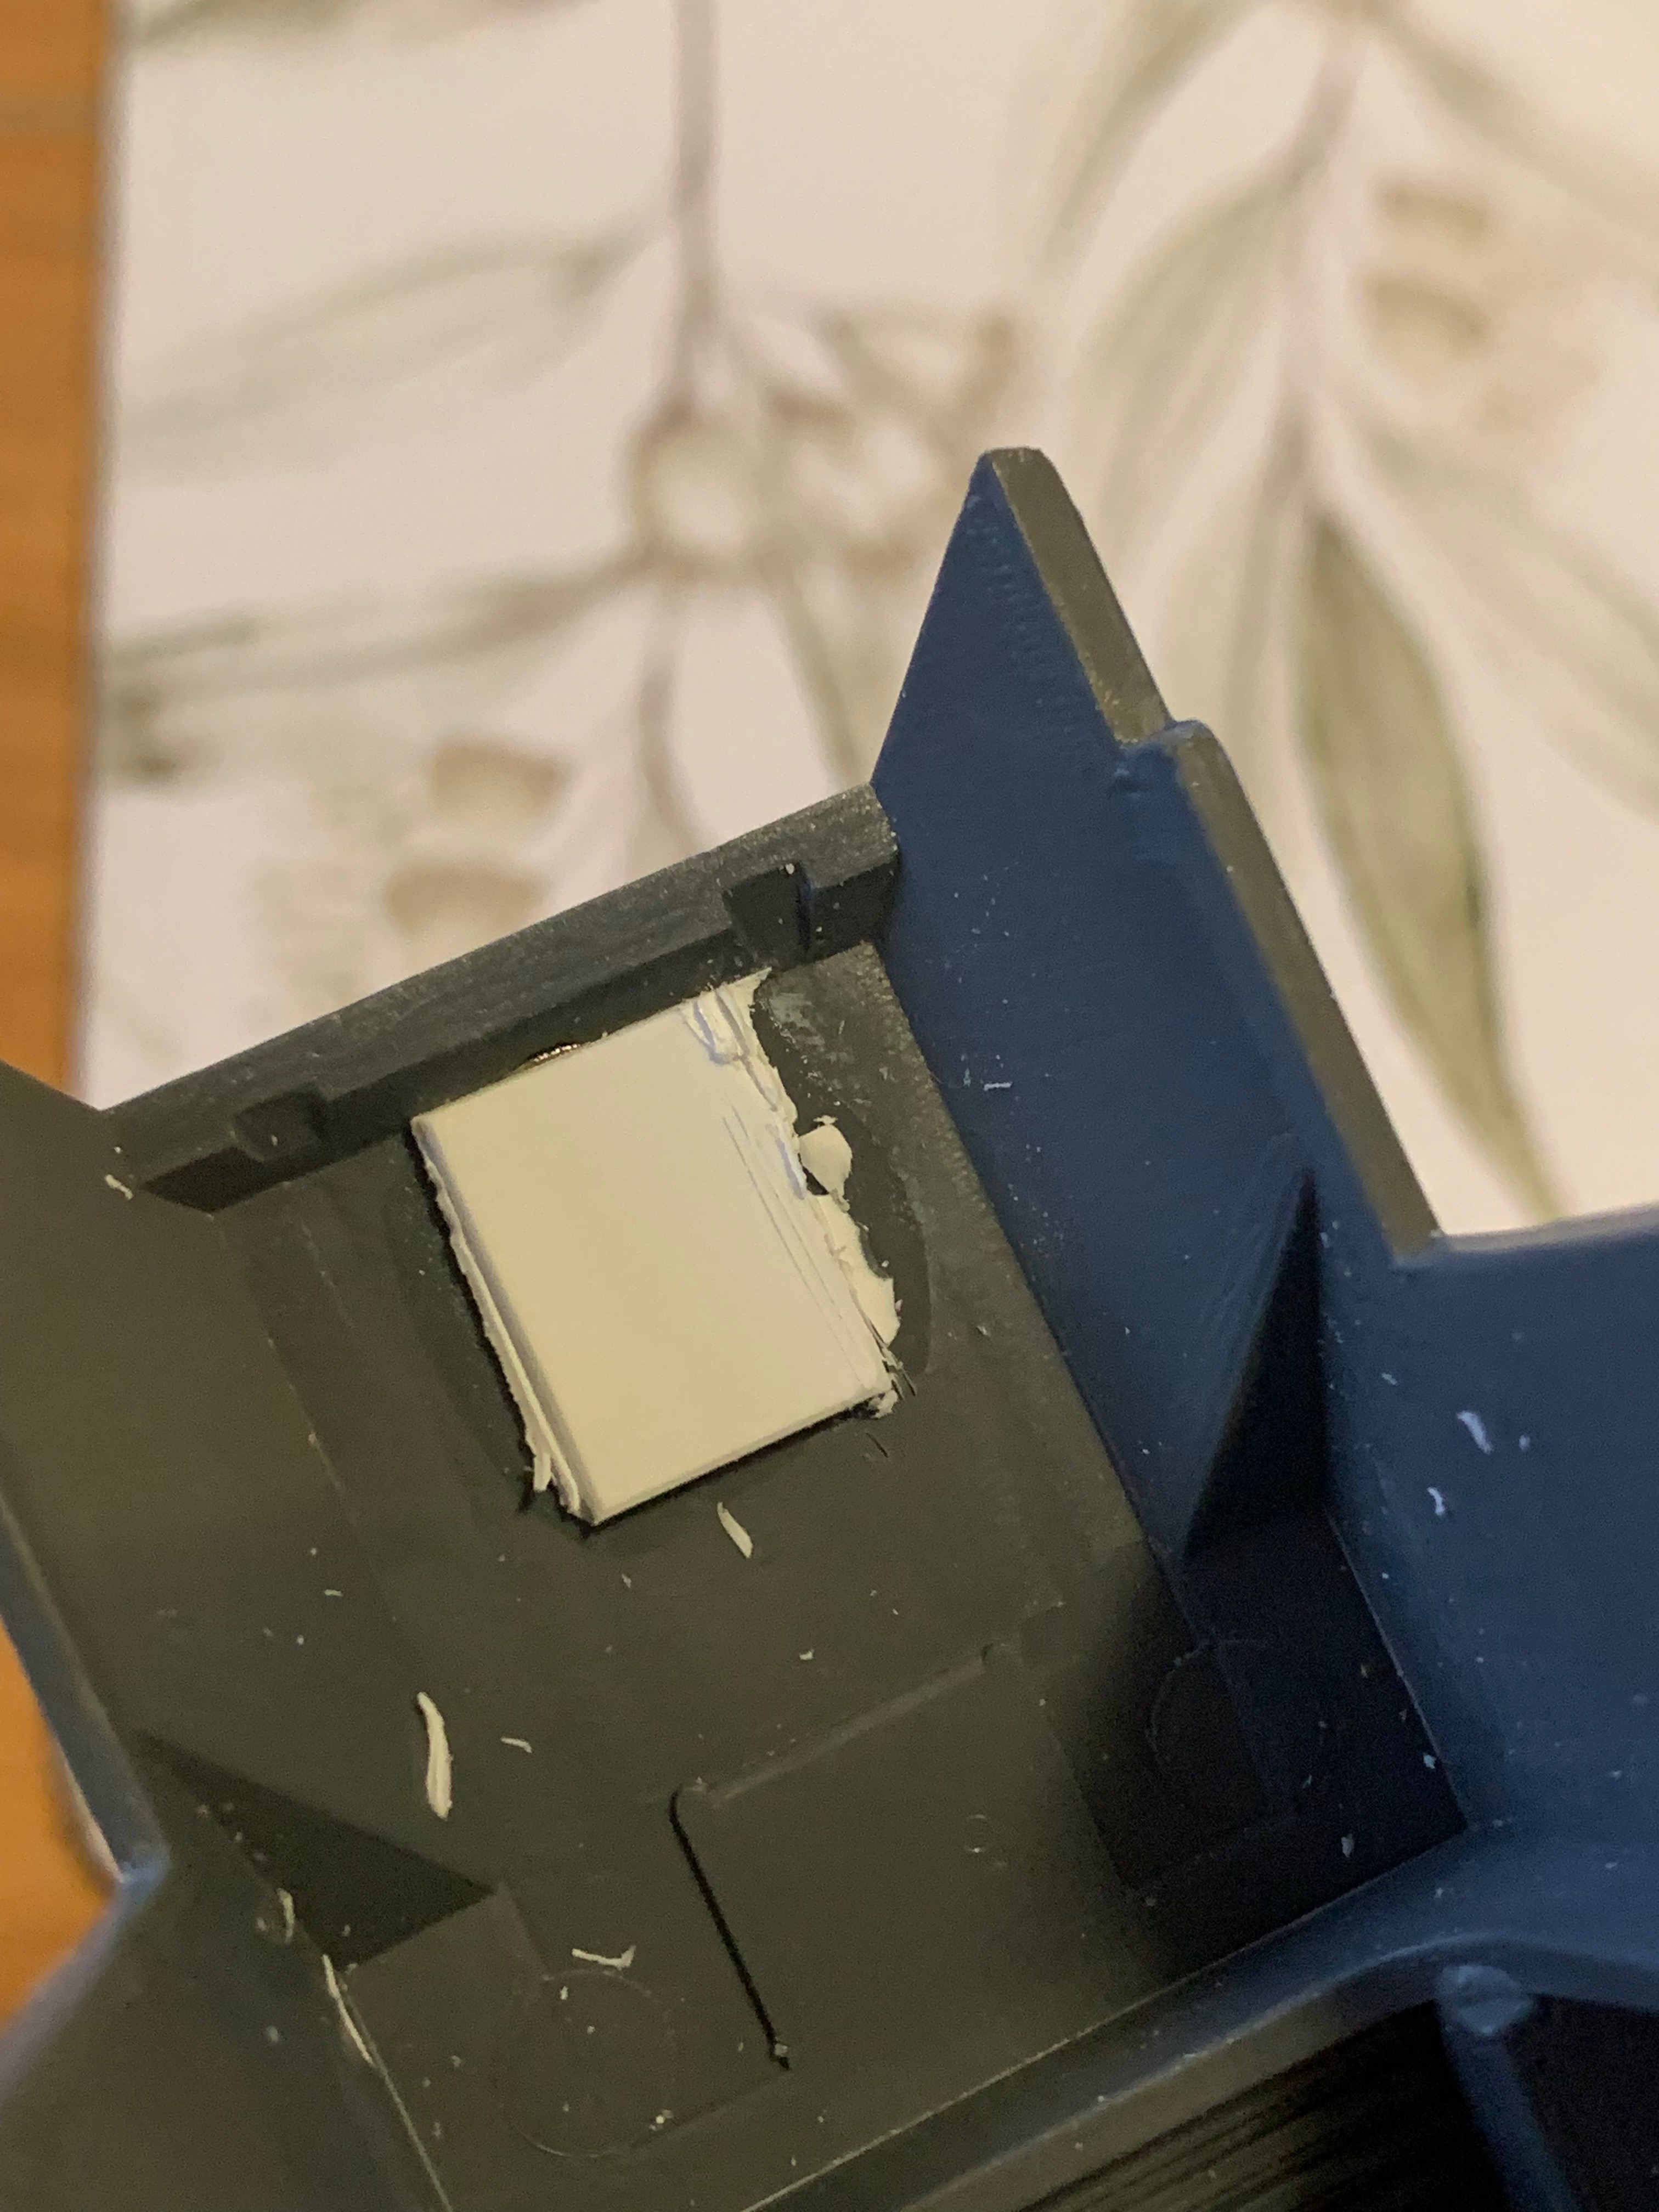
Inside the hulls I've added a square of plasticard as extra backing over the big flightstand magnet to add strength; and another square over the driver's gun mount. This will give a point to add magnets underneath.


For the drivers guns I opted to throw away the mounting brackets. They do look good - though I've gone for the much simpler option of magnetising the guns directly. To do that, I've wedged a piece of sprue into the space between the back prongs, waited for the plastic glue to set, then drilled a 3mm hole for a magnet. The sprue isn't flush with the gun - and the hole is just enough to take part of the 3x3mm magnet. Having a little bit protruding above makes it easier to connect with the one underneath the tank.

At this point I had something of a stupid idea. Once committed though it needed to be done.
The fire prism kit comes with 2 special supercharged engine parts - which in the codex you can add to any tank. The parts are designed to be integrated into the hull permanently, but I wanted to make these swappable between them. There are several ways that are faster, easier and better than what I did -
I had more 6mm magnets from the flight stands, and there is a roughly 6mm hole in the middle of the engine when you glue the top/bottom hull together. What if I could get a piece of plasticard wedged behind this, and mount the magnet on it. Test 1 involved some blutac. It did not fit particularly well, and it also added considerable weight that I didn't want on an object resting on a plastic stick.


The engines themselves have a locking piece on one side. Which needs to be hacked off.


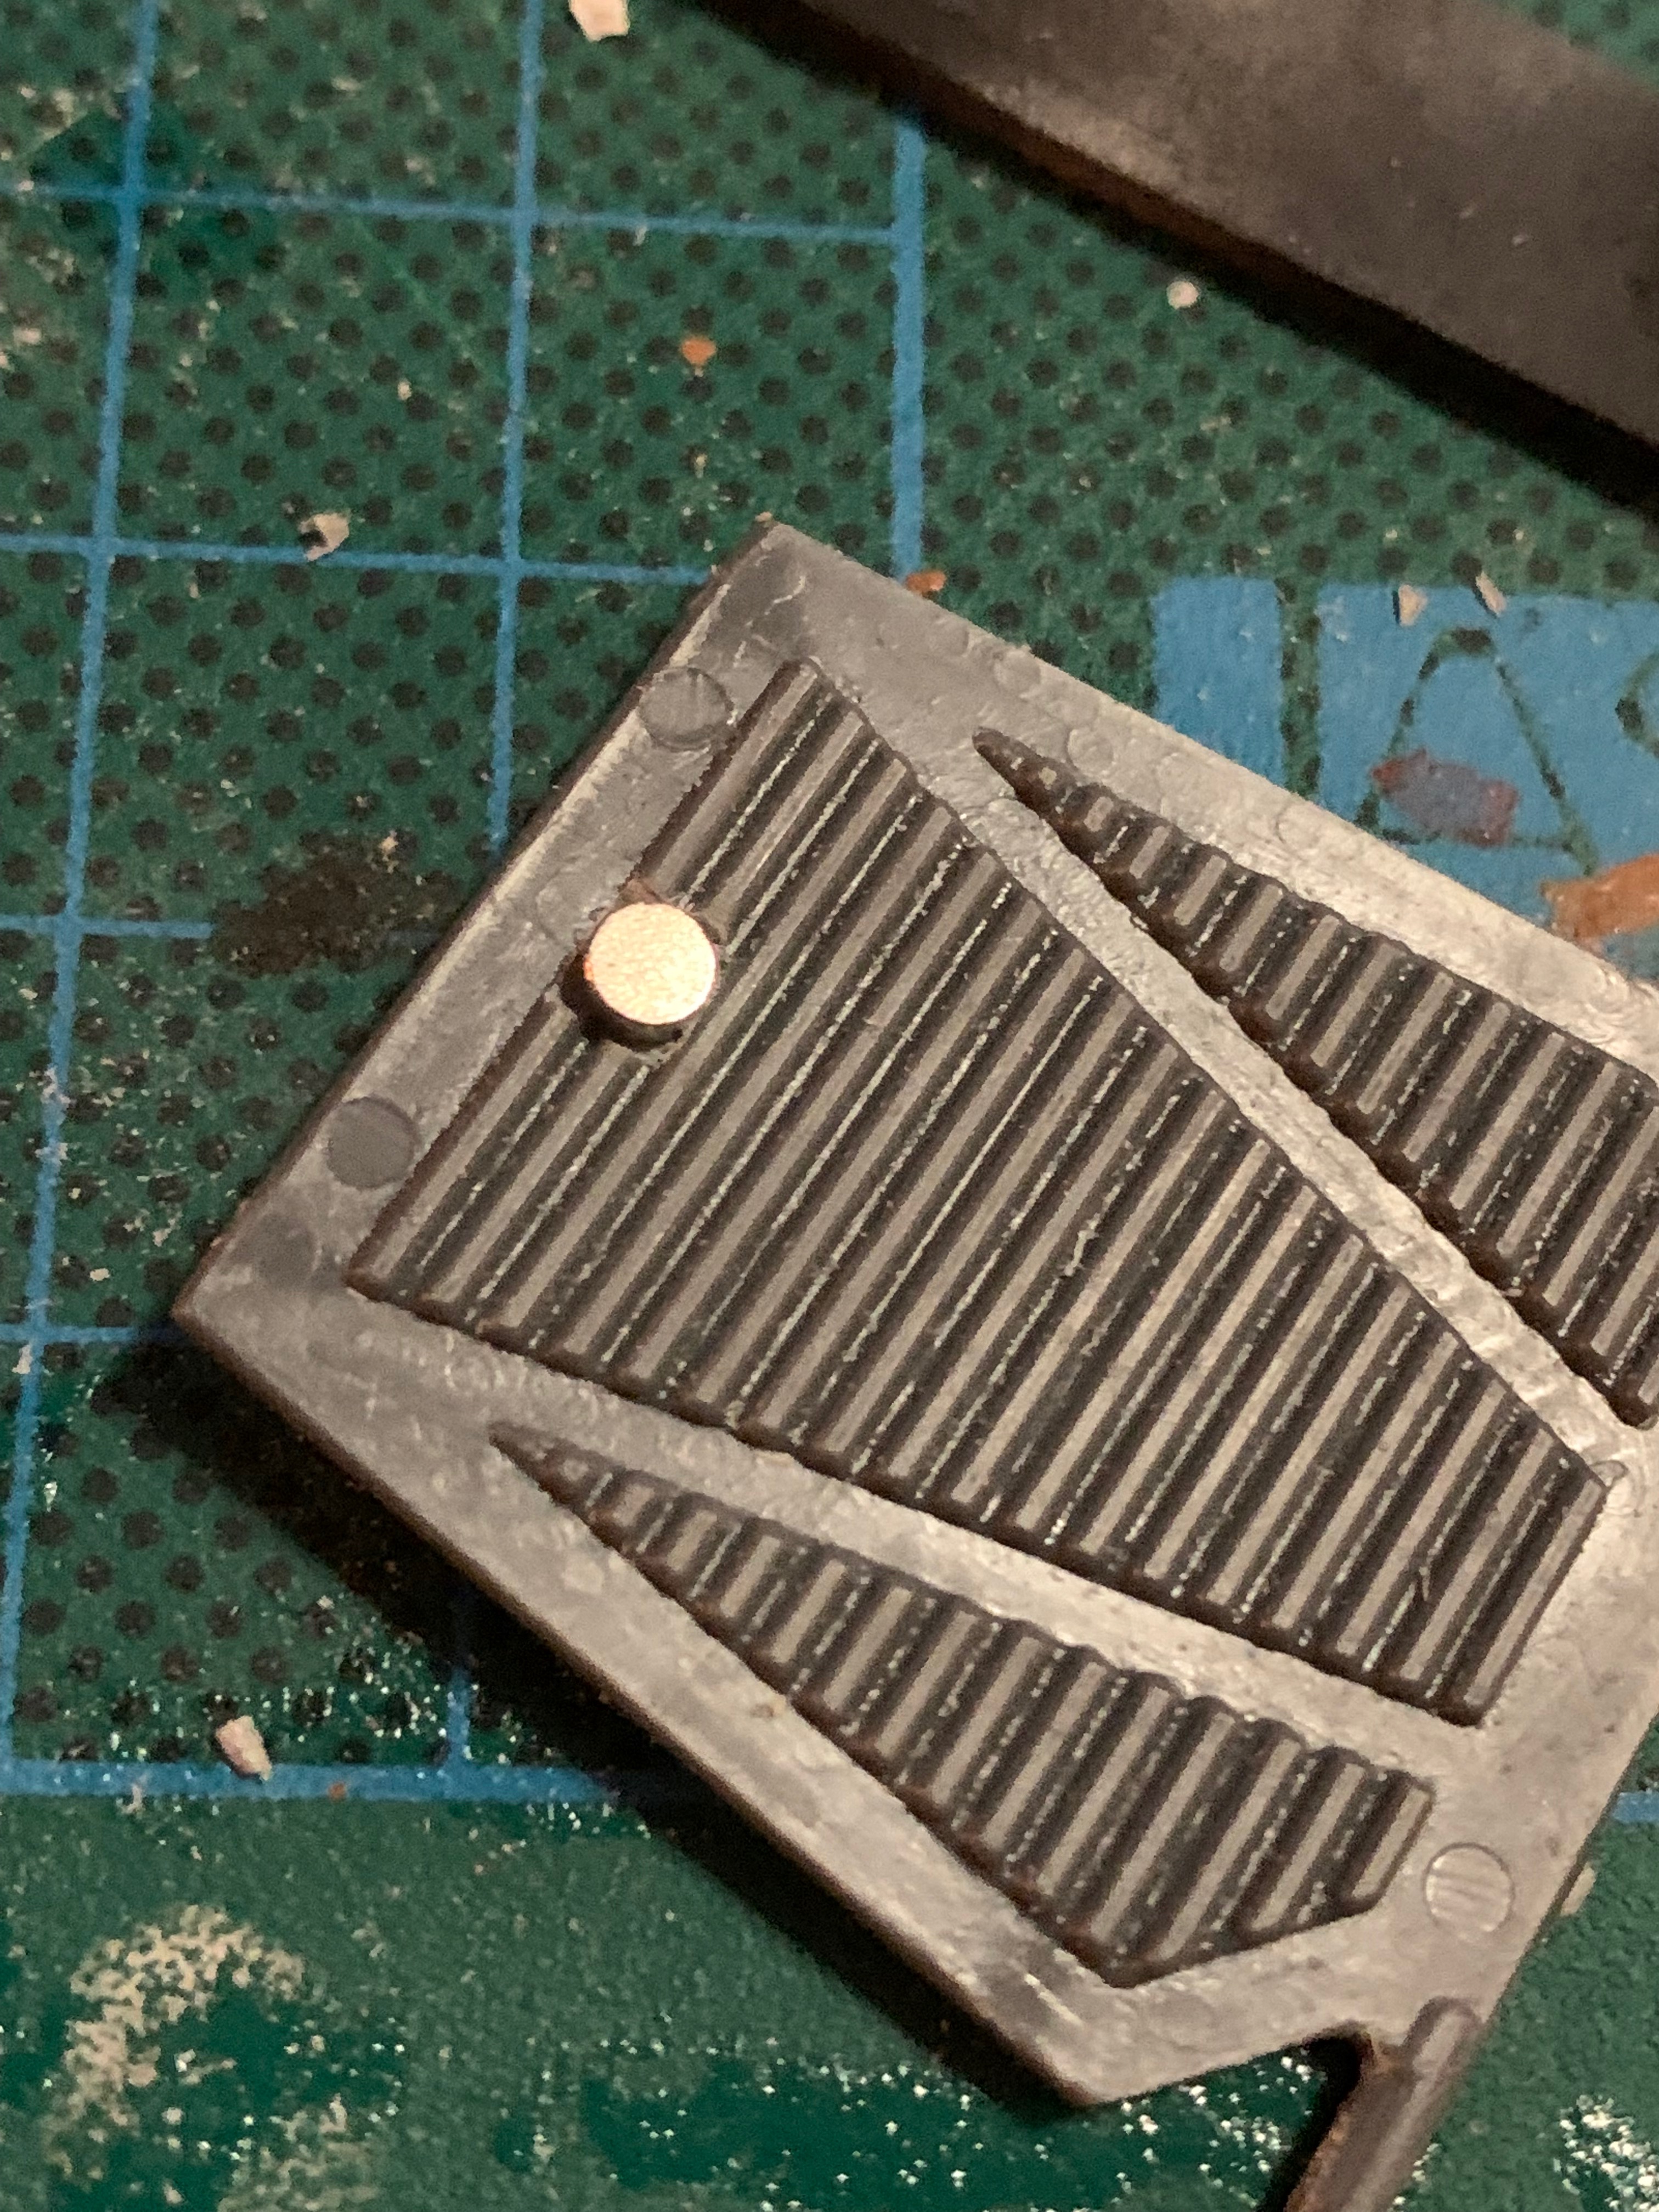
The remaining piece of engine though is of course a dovetail shape to stop it from ever being pulled out. Which then needs to be painstakingly shaved/sanded down so it can slip in/out of the engine.

This took me a depressingly long time, as it's all solid plastic, and the shape needs to end up circular - so lots of test fitting and then rubbing off any areas that were still making contact with the sides.

Can just see in this shot what also made the blutac a problem - the lower half of the engine hull has a big nub (that locks into the supercharged engine piece), and also digs into the blutac.

Time for plan B. There is about 8mm between the plasticard chunk and the back of the space. The last thing I want to have happen is for the plasticard superglue to break and the magnet to rattle inside the engine with no way to get it out.


So the humble sprue makes an appearance - 8mm long sections that can be used to wedge the plasticard inside the space. It's lighter than the blutac, zero risk of the plasticard getting away, and can even use regular plastic glue to secure it.

I chop up some more strips for the other tanks - I have 4 movable engines, but 10 slots across 5 tanks that they can fit into.


Then production line these pieces - lots of plastic glue to lock the sprue into place. Magnet goes on the outside of the plasticard.


Once the first piece of sprue has set - flip another piece on top and glue into place. Everything feels super solid, and works - albeit I am sure there are faster and easier ways to make these parts swappable.

Due to a slight error in length - when I cut the end off the engine inserts, I left a couple mm gap. So now I have to put this back on with a layer or 2 more of card.


This gives me 4 little missile objects of the right length. Lo and behold - perfect size now to slip in and out of any tank.


The first experiment with a 4mm magnet on these did not go well. The big 6mm magnet inside the housing is actually very powerful - it pulled the magnet and/or the first layer of plasticard off the engines. So these were swapped for tiny little 3x1mm magnets. Less force, less ripping power. It's main purpose is to give a gentle snick between them - rather than a big clunk.

The engine engineering took a long time and annoyed me at many points. I'd go with something much simpler if doing this again. On the other hand the next one was super easy - each of the upper hulls takes a turret of some kind; and the hole for this is a neat 6mm. Square of plasticard on the inside, magnet on the outside. Done. *However* - note that when the upper and lower hull eventually get glued together, there is a beam that is pretty close to the hole. When adding plasticard support - make sure it's clear of this beam.


The flip side of this magnet is then the turret set - the first two are for the prism/spinners. Clipped the bottom of the pin off, magnet on the end. Also adding a piece of card with a hole drilled through it to give some extra reinforcement.


The wave serpent turrent mounts are pretty easy - cut flat, drill hole slightly larger to take a 3x3mm magnet. This will sit nicely in the middle of the upper hull.


The smaller serpent turrets themselves go on top of this. They can generally sit on there with gravity, but on the obvious theme, I've drilled the little sticks out and replaced these with more 3x1mm magnets too.


Finally the falcon turret is an easy one - 6mm magnet on the bottom. Done.

The next piece took a few days of thinking and some craft - but I think I may have come up with an elegant solution to making the prism and spinners interchangeable. The main connection is between this little rod that sits inside the turret and can pivot; and the paired weapon arms that sit on top of this.
For your normal regular modeller, you glue the weapon arms onto the lower rod and you are done. The rod can even pivot up and down if you want your spinner weapons to point higher or lower. You can see in the pics below the angle that you'd probably use for the spinners (angled up) and the prism (pretty much horizontal).


The trick is getting the ends of the weapon arms to lock into place with relatively small and discrete magnets AND for the arm to be able to come up and out, as there is a notch near the tip that locks it over the rod below.

So my approach was to use two 2x2mm magnets in each arm, matched with the lower piece on the ends of each rod that will stay in the turret itself. I can then pack the cover panels with a little bit of blutac and glue them permanently onto the weapon.


The whole weapon and cowling over the top can then be lifted up and off with the magnets. Repeat for the fire prisms using the other set of cowls.


Ok - I have a problem. Anything that can get a magnet, gets a magnet. This one is a bit of a throwback to the falcon I had in ~1998. I opted to not glue the cabin shut and it kept flipping open during games. So the door is getting a small closure. I've scraped away the first two ridges on the door, and tucked a 3x1mm disc magnet in here. This is the same thing I use for marine arms.

Take a piece of sprue of random length, drill a pilot hole and 3mm hole. This is as flush as possible.

Close the door, and then drop the sprue into the space. The sprue will nicely centre itself where the magnet needs to be. Sneak some plastic glue underneath to weld it to the frame.


When the door is open, it should look like the sprue was always supposed to be there.

The final touch is to make a door handle. Most tank doors (marines & eldar of all kinds) are quite difficult to open with a fingernail once a magnet is holding it shut. Luckily, there are some nice circular pieces on most of our sprues. They can be cut short, then notched with a file/knife on one side at the back. Once glued onto the door itself, that will give a little area that a fingernail can get under to open the door. Note that plastic glue during construction is much better for making this a solid join vs trying to retrofit with superglue later on.


Something I missed earlier - the serpent hulls that get glued over the falcon chassis have 2 'rails' underneath that lock the parts together. I hadn't noticed when adding plasticard over the big flying stand magnets - and now have to cut some of this away to get the hull parts to fit together.

The 2 upper falcon hulls that are getting turned into serpents have their extension parts added. Upper and lower hulls are still separate for painting.


Comfortable that all the internal magnets and parts are set, the lower hull parts are glued together. This will seal the engine compartments, and then the back doors/troop areas are joined on.

The heavy weapons for tanks are joined side to side (whereas walkers are joined underneath) - they will be interchangeable with all the tanks, but not the other models. Easiest way I found to do these is to drill a 3mm hole exactly where the original hole is, then stick a 3x3mm magnet straight through. That allows the weapon to be used on either side of a tank. The trick is to make sure the same side of the magnet is inserted on the same side of each weapon - so they are all universally swappable.


There isn't much more to do before painting now, so I've started to add the decorative pieces that were easier to leave off earlier. The falcon & serpents have slightly different prongs under the driver area.


Ok - so not quite done with magnets. There are a few little communication/equipment bubbles that can be glued onto the outside hull. Of course - having the option to add/remove these means they can be used as marker tokens too (eg, to show which tanks are occupied; or to designate vehicles with optional gear like a targeting matrix). A 6mm magnet under the surface is enough to secure a 3x2mm magnet in a piece of equipment up above.


The more custom engineering piece is the set of flying bases - these are 10mm clear acrylic rod found on eBay. I purchased a few sticks that were about 10cm long - that way there are 2 'machined' ends that should be perfectly flat. When I cut these in half, it doesn't matter too much if the end going into the resin base is a little rough or out of alignment... but I want the surface the tank is sitting on to be as flat as possible.


Working up through sizes slowly using a hand drill. 2-3mm holes make it a lot easier to widen out to 6mm than trying to drill big in one go.

In the one below - I went a bit further than needed with the 2mm drill and you can see the extra little bit of space inside the end. This doesn't matter much in practice as unless you got well underneath the tank you'd never see it at all.

Finally no more magnets to put into these things. Think that's everything and we can move onto painting stages.
No comments:
Post a Comment